
Proper Wader Care and Storage

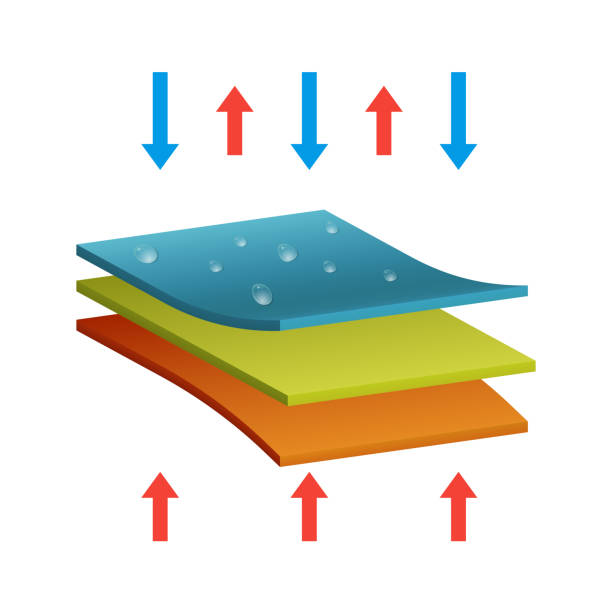
Technical Breathable Fabric Waders are your go-to gear for staying dry while fishing or wading through water. Made from breathable fabric layers, they feature a special membrane that lets moisture escape from the inside while blocking water from getting in. Think of it as a one-way street for sweat – it goes out, but water can’t come in! This smart design keeps you dry and comfortable, even when you’re knee-deep in your favorite fishing spot.
Taking care of your wading gear is key to making it last. Dirt, mold, and bacteria can wreak havoc on the threads, adhesives, and waterproof barriers. Keep your gear clean and well-stored to ensure it stays in top shape for all your adventures!
Breathable wader fabrics aren't naturally waterproof. They're made of multiple layers of fabrics that are glued together and then coated with DWR to repel water. Adhesive seam tapes are applied along the seams in the inner-shell to make the seams watertight. Regular cleaning and care keep these components in top shape. Wading boots and other gear, also made with adhesives and threads, need similar care and storage.
Moisture-wicking: Opt for moisture-wicking materials that push sweat out through the wader fabric, keeping you dry and comfortable. Avoid cotton or other absorbent fabrics, as they trap moisture, making you feel wet and clammy.
-
Remember, even in cold temperatures, we sweat inside our waders, so proper base layers are key to staying dry and warm.
Prolonged exposure to extreme temperatures or frequent temperature fluctuations can damage your wading gear.
Adhesives expand when heated and contract when cooled. Prolonged exposure to extreme temperatures and direct sunlight can reduce adhesion, causing glues to separate from materials. Avoid storing your gear in a car for long periods, and protect it from direct sunlight to prevent adhesive degeneration.
-
Extreme temperatures often cause boot sole adhesives to fail, leading to soles peeling off.
-
Extreme temperatures often cause wader seam tape adhesives to fail, lift, resulting in leaky waders.
For long lasting gear, follow these care and storage tips:
Transporting wet gear:
After a day on the water, keep a bin or container in your vehicle for wet gear. Place boots on the bottom and loosely lay the waders on top.
-
Important: Do not seal the container with a lid. Leaving it open allows air circulation, helping your gear dry even if you forget to remove it from the vehicle—a common mistake!
How to rinse, dry & store after use:
When you get home, always rinse your gear with a hose or in the shower to remove soil, microorganisms, bacteria, sweat, and body oils.
-
Cross-Contamination: Remember, Our gear can cross-contaminate waters. Microorganisms and bacteria can cling to any wading gear used in nature, especially in wet environments.
Effects of Salt Water:
-
Salt water can be particularly harsh on wader gear, accelerating the breakdown of materials and causing corrosion.
-
Always rinse gear thoroughly with fresh water after exposure to salt water to prevent damage.
Drying Waders:
- Outer-shell: Lay waders over a chair or railing to air-drip for 12 hours.
- Inner-Shell: Turn them inside out and let the inside air-dry for 24 hours or until completely dry.
- Outer-shell: Once the. inside is completely dry, turn them right side out and hang in a well-ventilated room with natural light to allow the outer-shell to complete drying.
-
Drying Machines: Avoid using a dryer for your waders unless they have been thoroughly and deeply cleaned first. Drying dirty waders can bake in the dirt, causing further damage.
Rinsing & Drying Boots:
- Rinse thoroughly and drain by leaning them upside down for 24 hours.
- Then, place them upright to finish drying.
- Remove padded insoles to air-dry separately.
-
Dirt, microorganisms, and mold can cause boot threads to dry rot quickly if not rinsed and dried properly, leading to boot blow-outs. Always ensure your boots are thoroughly rinsed and dried to prevent this issue.
Quick Care
Rinsing the outside is always recommended, but sometimes we can't always rinse and store right away. The key is in providing air ventilation.
If soiling is light or rinsing isn't accessible, make sure to air-dry the outside thoroughly as possible between uses. If the inside of the wader is dry and doesn't need rinsing, hang or lay it out to dry, ensuring the inside is open to the air to allow moisture to evaporate.
- Isn't it worse for gear to keep getting wet and drying out, than to just stay wet? Actually, no! Mold, fungus, and bacteria thrive in constant moisture. Letting things dry out in between helps zap those pesky nuisances.
Storage Tips for Wading Gear
Always store your wading gear in a well-lit, well-ventilated room, away from direct sunlight and extreme temperatures.
- The best practice is to hang your waders with the insides open for proper air circulation.
- For long-term storage, make sure your gear is clean to prevent dirt, oils, bacteria, and mold from causing damage.
Revitalizing Your Waders: DWR
Breathable wader fabrics aren't naturally waterproof; they're coated with a durable water repellent (DWR) treatment to keep water out. This coating can wear off over time, especially with exposure to chemicals like DEET in insect repellent. The good news? You can easily reapply a DWR treatment from various brands to restore the waterproof barrier.
- Frequent anglers should treat their gear after every heavy-use season. Moderate users should apply it once a year
- Light users every two years.
Always apply DWR after a deep clean and follow the manufacturer's instructions, as they can vary. Some factory DWR coatings reactivate in the dryer—just check the care directions from the manufacturer.
- DWR treatments aren't just for waders—they work wonders on rain jackets, tackle bags, and tents too!
Final Note
While it's easy to blame manufacturers for wading gear failures (and sometimes they are at fault), most issues stem from improper care, use, or storage by the user. You can extend the lifespan of your gear by adopting good care practices and diligently following the manufacturer's recommendations. Always check with the manufacturer for cleaning, revitalization, and storage guidelines before you start.
Cleaning Instructions
MACHINE WASHING & DRYING
Washing Directions:
- Check the Label: Always start by reading the care instructions provided by the manufacturer. They will give you the best guidance specific to your waders.
- Use a Front-Load Washer: Only use a front-load washing machine. Top-load washers with agitators can damage the fabric.
- Cold Water Cycle: Set your machine to a gentle cycle with cold water. Hot water can damage the waterproof membrane.
- Mild Detergent: Use a mild detergent designed for technical fabrics. Avoid powder detergents, bleach, and fabric softeners as they can harm the material.
- Remove Loose Parts: Take off any removable parts like wading belts before washing.
- Zip Up: Make sure all zippers are closed to prevent snagging.
- Wading boots should never be washed in a washing machine. Hand-wash only.
Cautions:
- Avoid Fabric Softeners: Fabric softeners can clog the breathable pores of the fabric, reducing its effectiveness.
- No Bleach: Bleach can break down the fabric and damage the waterproof coating.
Drying Directions:
- Drain Excess Water: Waders can hold a lot of water. Hold them upright and take them to a water-safe area. Turn them upside down and hold by the booties to drain.
- Second Rinse: If the water is very soapy, run a second rinse cycle on the inner shell.
- Air Drying: Turn the waders inside out, hang over a chair or railing drying the interior first, then flip them to dry the exterior. If in a bathtub, lay them flat. Wet waders can be very heavy, so avoid hanging them by the suspenders or upper body to prevent stretching the elastics and fabrics. Air drying is usually best.
- Using a Dryer: Only tumble dry if the manufacturer says it's safe. Use delicate or low heat, and readjust the waders every 10 minutes to prevent tangling and scorching.
- Reactivation: Now that your wader is though roughly clean, it is a good practice to finish with a DWR revitalization treatment. Always follow the DWR manufacturer's care instructions.
- For Miss Mayfly Waders, You may wash and dry as instructed above.
- Wading boots should never be dried in a drying machine. Air-dry only.
WARNINGS:
- Avoid Fabric Softeners: Fabric softeners can clog the breathable pores of the fabric, reducing its effectiveness.
- No Bleach: Bleach can break down the fabric and damage the waterproof coating.
- Do not use harsh chemicals
- Do not iron
- Do not use a scrub brush
Hand Washing & Drying
- Prepare the Receptacle: Fill a watertight bin, storage container, or bathtub with warm water. If using a bin or container, it's best to do this outside with a hose.
- Add Cleaner: Mix in wader cleaner made for technical waterproof fabrics. Dawn Anti-bacterial Dish soap can be sparingly used on Miss Mayfly Waders.
- Submerge and Agitate: Submerge the waders in the water, agitating to ensure the cleaner gets inside and the waders are fully submerged.
- Soak: Soak for 20 minutes for light soil, or up to one hour for heavy soiling.
- Drain Excess Water: Remove the waders and hold them upside down to drain excess water. If using a bathtub, drain the tub first.
- Soak Your Boots: Don't forget your boots. Soak them in the bin/tub of water while you finish cleaning your waders. If you did not use anti-bacterial dawn in the wader water, add it now to aid in killing anything living in/on them.
- Lay Flat: Turn the waders inside out, hang over a chair or railing. If in a bathtub, lay them flat. Wet waders can be very heavy, so avoid hanging them by the suspenders or upper body to prevent stretching the elastics and fabrics.
- Rub Fabric: Fold a piece of the fabric onto itself and rub back and forth. For stubborn areas, rub in circular motions. Only rub the outer fabric, not the inside membrane. For tough stains, apply straight Dawn Antibacterial Dish Soap. Flip and rub the opposite side.
- Rinse: Using a hose or shower head, rinse the outer-shell of the waders until no soap or bubbles remain. Rinse underneath boot guards, inside double layers on the legs, and inside all pockets.
- Rinse Inner-shell: Turn the waders inside out and rinse until all soap is removed.
- Rinse Your Boots: Now is a perfect time to remove your boots and give them a rub down with a rag. A Magic Eraser can be gently used to remove stains and scuffs. Rinse the outer and inner fabrics thoroughly until water is clear. Place upside down to drain for 24 Hrs, then flip and set aside right-side up until they are thoroughly dry.
- Dry Inner-Shell: Lay the waders over a chair or railing to dry the inside thoroughly, flipping front to back as needed.
- Dry Outter-shell: Turn the waders right side out and allow the outside to dry for at least 24 hours, flipping front to back as needed.
- Final Dry: Turn the waders inside out one more time and air dry for 24 hours or until completely dry. Thourough drying of the inner shell is most important.
- Ready to Store: Turn the waders right side out, ensuring they are completely dry and hang them in a well-lit, ventilated room.
Leave a comment